Installing BiG EVAL
Installing BiG EVAL is a three step process. The installation wizard copies all files needed to the installation folder and sets up the BiG EVAL Windows Service. The web based Configuration Wizard will be opened afterwards and helps you setting up the initial configuration of your BiG EVAL environment. The last step is to upload a license file that unlocks the licensed functionallity.
Before you begin
Please follow the steps described in Preparing the BiG EVAL server before you proceed with the installation.
Installing BiG EVAL
- Log in to your BiG EVAL server with local administrator permissions.
- Extract the downloaded installation-package on the server.
- Start the installation wizard by double clicking on BiGeval.exe.
- Read the license agreement carefully and accept it by clicking on the “Install” button.
- Die installation wizard needs local administrator rights. Depending on your system configuration you need to confirm that in a dialog by clicking on “Yes”. If that dialog doesn’t appear, you already have local administrator permissions.
- The installation wizard installs all software-components that are required by BiG EVAL.
If the installation wizard asks for a restart, do this now and repeat steps 3 to 6. - After a short while the welcome dialog appears. Click on “Next” to proceed.
- Read the license agreement carefully and accept it by clicking on the “Next”.
- Accept the default installation folder or change it if needed. We recommend using the default folder.
- Choose whether you want to use a dedicated active directory user (recommended as described in the system requirements) or the local system account as your service account.
We explicitly recommend using a dedicated active directory account as your BiG EVAL service account, because this simplifies the access to the data you want to access within your test cases. It also strengthens the security! - Start the installation by clicking on “Install”.
- When the installation wizard has finished, a browser window with the configuration wizard opens automatically. If that doesn’t happen, open a browser and navigate to http://localhost:1703.
Configuration Wizard
When the installation wizard has finished, a browser window with the configuration wizard opens automatically. If that doesn’t happen, open a browser manually and navigate to http://localhost:1703.
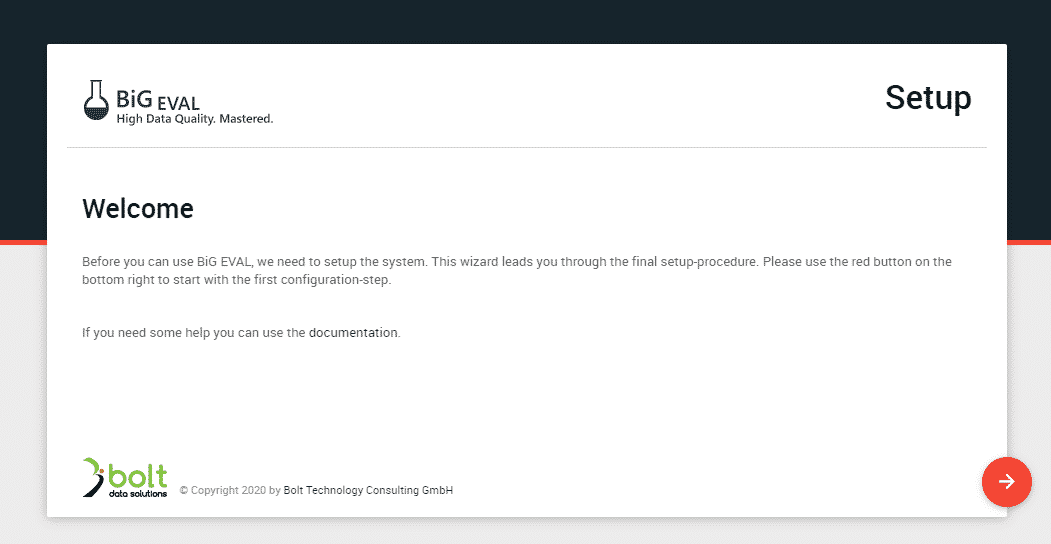
The configuration wizard leads you through the initial setup steps that are described below. Each setup step has an own wizard page. Use the red arrows on the bottom to navigate to the next step.
At the end you will see a summary page that shows the settings you made. Confirm these settings with the red arrow on the bottom to apply them. After a short while the login page appears and your BiG EVAL is up and running.
URL Setup
This wizard page allows you to setup the URL you use when accessing the BiG EVAL graphical user interface (GUI or Frontend). There are several options you can choose from. On the bottom you see a preview, that shows you, how the URL would look like at the end.
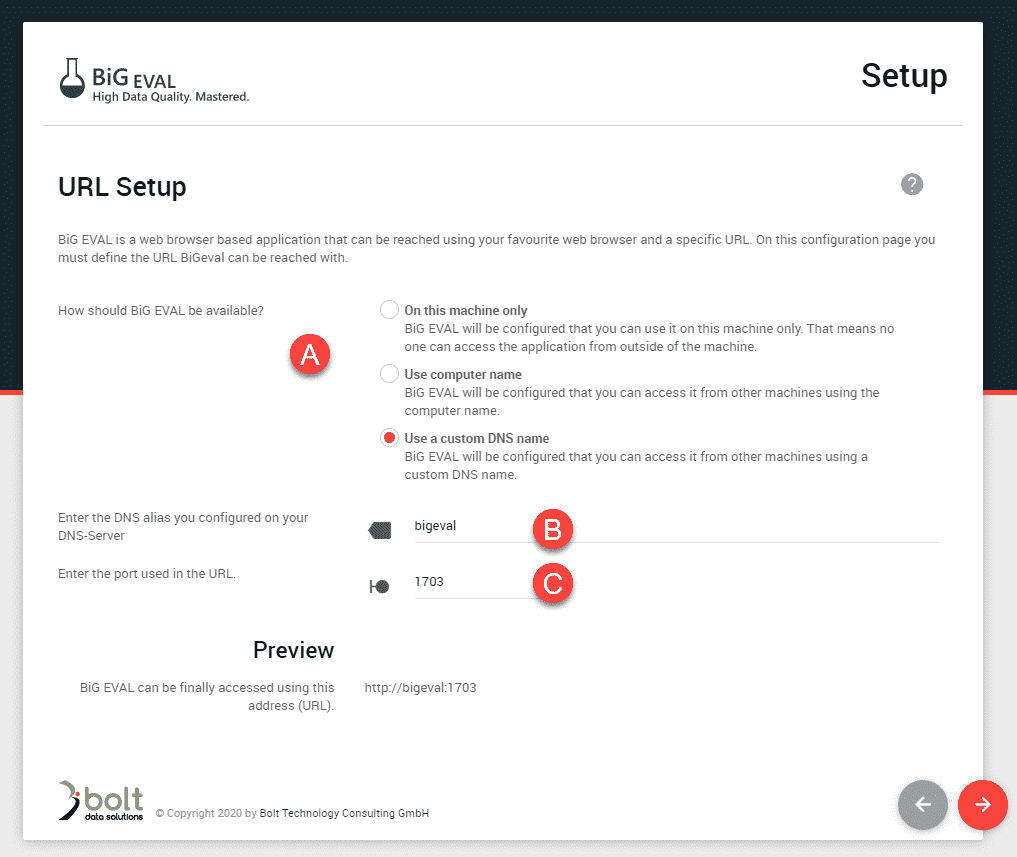
(A) URL Options
There are three options to choose from:
- On this machine only
BiG EVAL will be configured, that you can use it on the BiG EVAL server only. That means no one can access the application from ourside of the server.
We basically do not recommend this option.
e.g. http://localhost:1703 - Use computer name
BiG EVAL will be configured that you can access it from other machines using the computer name.
e.g. http://my-machine:1703 - Use a custom DNS name
Setup an own DNS name on your DNS server that can be used to access the BiG EVAL frontend. This is the most convenient way for your users, but the most complex way for you when setting it up.
Ask your DNS Administrator to setup a CNAME that points onto the BiG EVAL server hostname, or ask to setup an A-record that points to the IP-address of the BiG EVAL server.
e.g. http://bigeval.mycompany.com
(B) DNS Alias
If you choose the custom DNS name option in (A), you get this input box to enter the DNS-name that should be used.
(C) Port
Enter the HTTP-Port that should be used to access the BiG EVAL frontend. To avoid conflicts with other applications we setup the default to port 1703. You can use that port, or you can change it. Please ensure that no other application is using the port you setup in this field. BiG EVAL tries to check that if possible.
Database Setup
BiG EVAL stores meta data (its configuration, the test case definitions and the test results) in a Microsoft SQL Server database management system. On this configuration page you define the server, the database and the connection parameters.
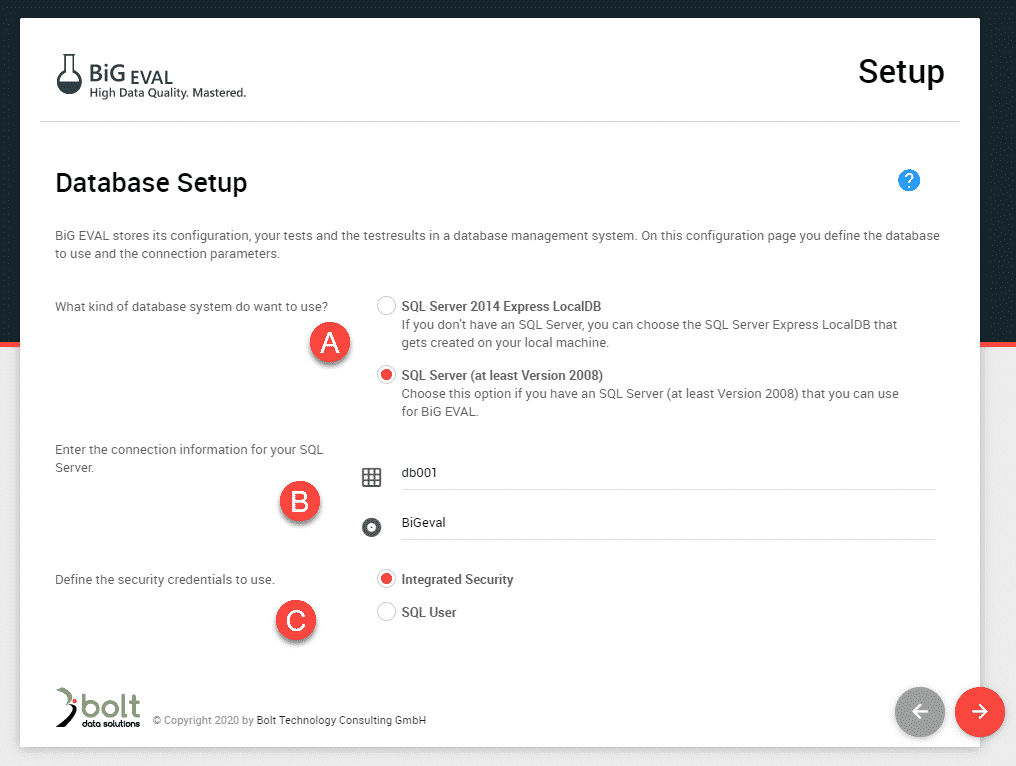
(A) SQL Server Option
Installing BiG EVAL without a dedicated SQL Server
If you choose the Option SQL Server 2014 Express LocalDB in (A), the configuration wizard installs a leightweight and free version of Microsoft SQL Server 2014 and uses it as its meta data store.
You can use that option if you don’t have a dedicated SQL Server available. But we recommend this setup only for trial- or sandbox-installations, and not for productive BiG EVAL installations.
If you have a SQL Server available, choose the second option in (A).
(B) Database- Server, -Instance and -Database
Enter the name of your SQL Server database host in the first input field. If your SQL Server runs on a named instance, enter it in the form of server\instance
Enter the name of the database that should be used to store BiG EVALs meta data and test results into the second input field. You can either use a name of a database that doesn’t already exist, or you use the name of a database that has been created before. Follow the instructions depending on whathever you choose.
Using an already existing database
There are circumstances that urge you to create the SQL Server database in upfront of installing BiG EVAL. That means, that BiG EVAL isn’t responsible of creating the database on the SQL Server. Instead a database administrator performs this task. When doing this, ensure that the database is completely empty and the BiG EVAL Service Account (or the user entered in option (C) of the wizard page) has db_owner rights. Because BiG EVAL will setup all database objects within the database.
Using a database that doesn’t already exist
If you plan to let BiG EVAL create a new database on your SQL Server, the BiG EVAL Service Account (or the user entered in option (C) of the wizard page) needs db_creator rights on the server-level.
(C) SQL Server Authentication
You can use integrated security to connect to the SQL Server. In this case, the BiG EVAL Service Account is used for authentication.
If you choose to use a SQL Server user, you first need to create that user on the SQL Server and enter its credentials in the username and password input fields that appear when choosing this option.
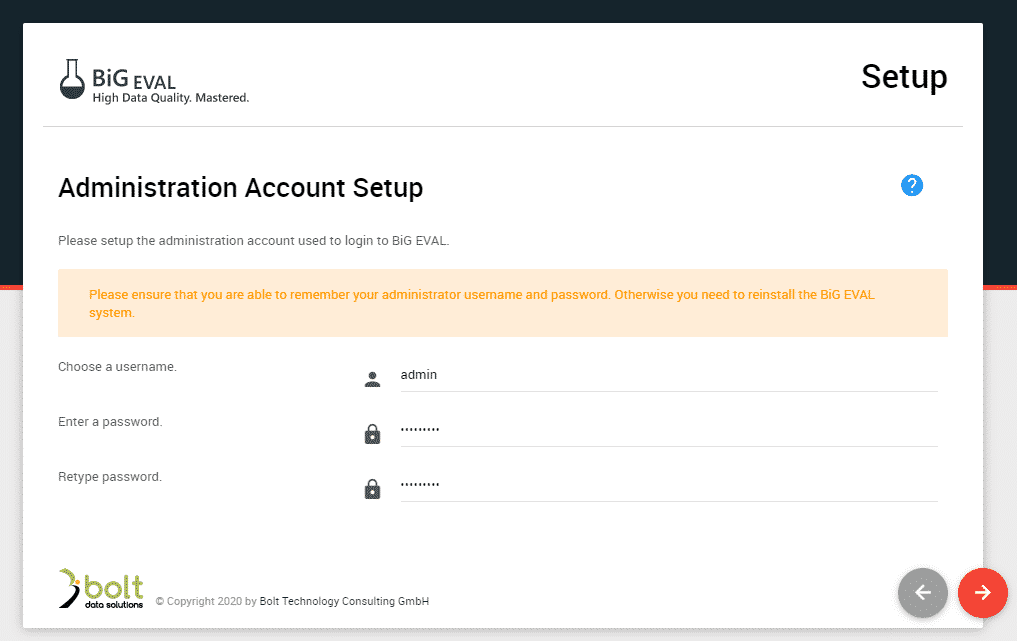
Administration Account Setup
BiG EVAL will be installed with its own user management system by default. You can change that later if you want to use Active Directory instead.
In this configuration step you define the administrator account that has foll admin-rights within BiG EVAL. You use that account to login to BiG EVAL initially.
Please make sure to note the username and password carefully, because you will not be able to login to BiG EVAL if you loose them.
Upload License
When you first login to BiG EVAL, you get asked for a license file. The BiG EVAL staff has sent you the license file via email. Upload it and you’re good to go.